Easy Watercolour Beach Painting – Reflection
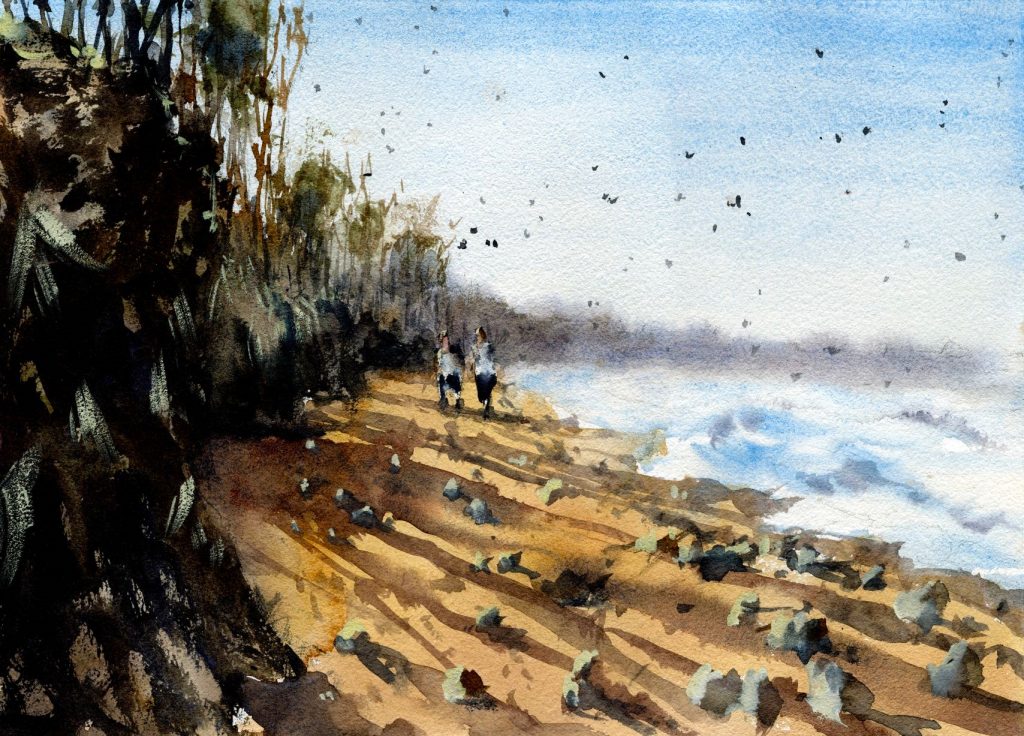
In this easy watercolour beach painting demonstration, I go through how to paint a rocky beach landscape. You can view this workshop through the link here.
One of the main features of this scene is the elongated shadows cast by the low cliffs to the left. They create dramatic and diagonal shadows across the scene that draws attention and create contrast with the yellow of the sand.
This painting was painted in two main parts. Firstly, the wet-in-wet areas and light areas.
It’s important to define your light source early in the beginning, and get in all the lighter coloured areas of your painting.
In this scene, I made sure to paint the yellow of the sand first with some yellow ochre and titanium white. It’s important to get the yellowish areas in first, as once you pick up any blue hue, it can easily mix with your yellows and turn them green!
For the water, I first wet the paper with some clean water, then added some cerulean blue while the paper was still wet. this creates some softness in the water and also allows you to imply the softer white areas of the water.
For the sky, I added a stronger cerulean blue mix to the top of the page and diluted this mix as I moved down the page. The distant mountains were added in while the sky mix was still wet.
Now comes the fun bit – adding the dark areas and shadows! The darkest tones are in the cliffs to the left. Once the first wash of lighter colours had dried, I added in the full tones for the cliffs, then the mid-tones for the shadows. The diagonal shadows are lighter than the cliffs.
All in all, I enjoyed painting this one, and I like the contrast of the light and dark areas and the simple figures in the center.


