
I recently ran a free online workshop on how to Draw and Paint Venice and Annecy. You can view it below. In this article, I thought I’d add a few of my observations and tips on how to draw and paint these two scenes to this article.
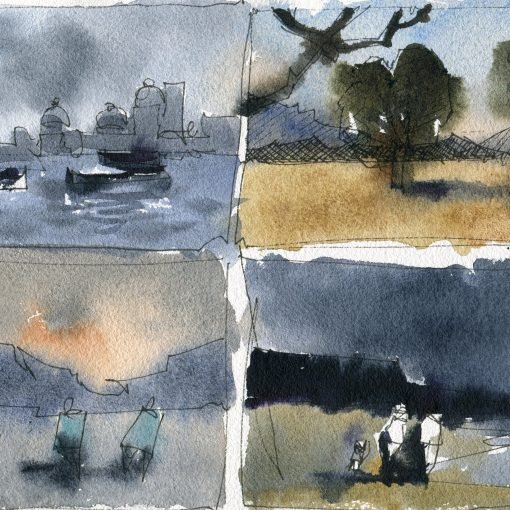
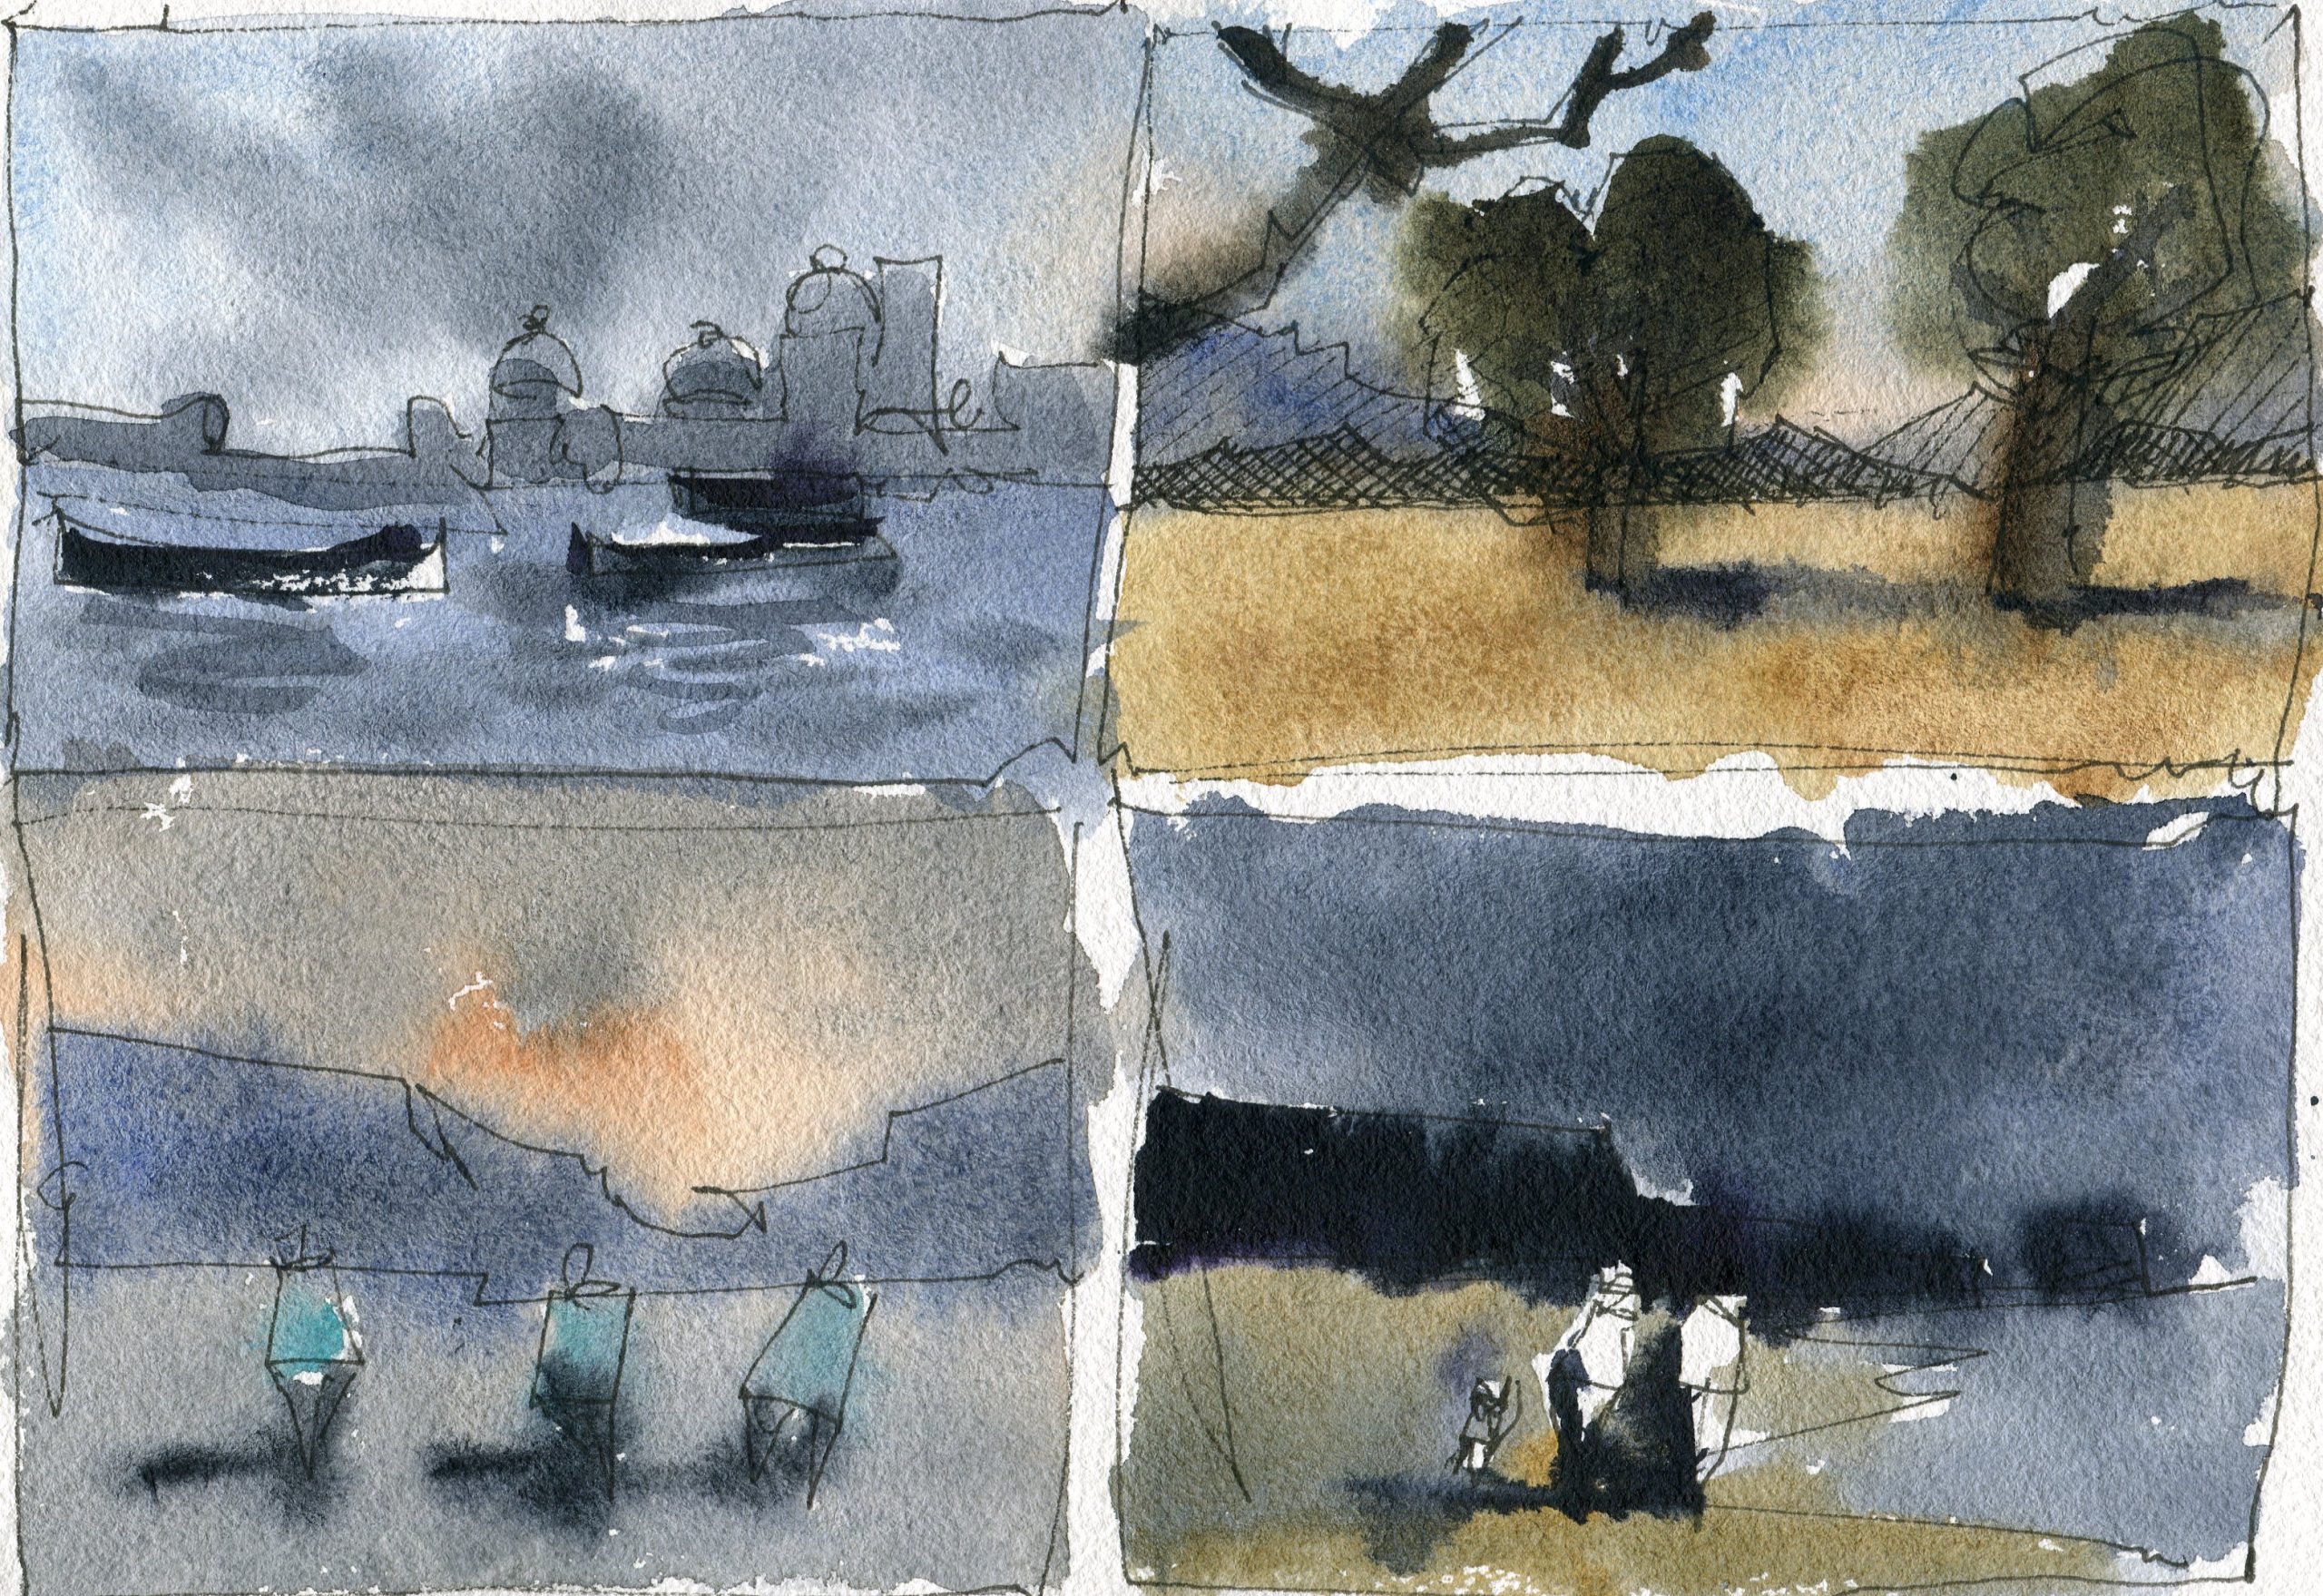
Composition:
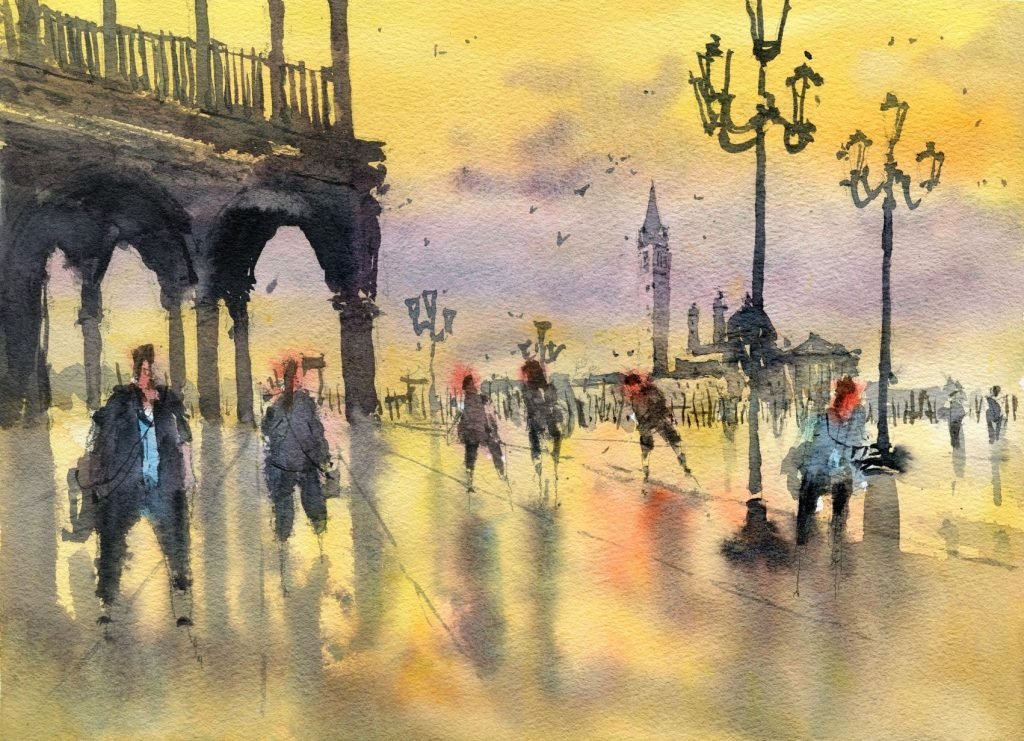
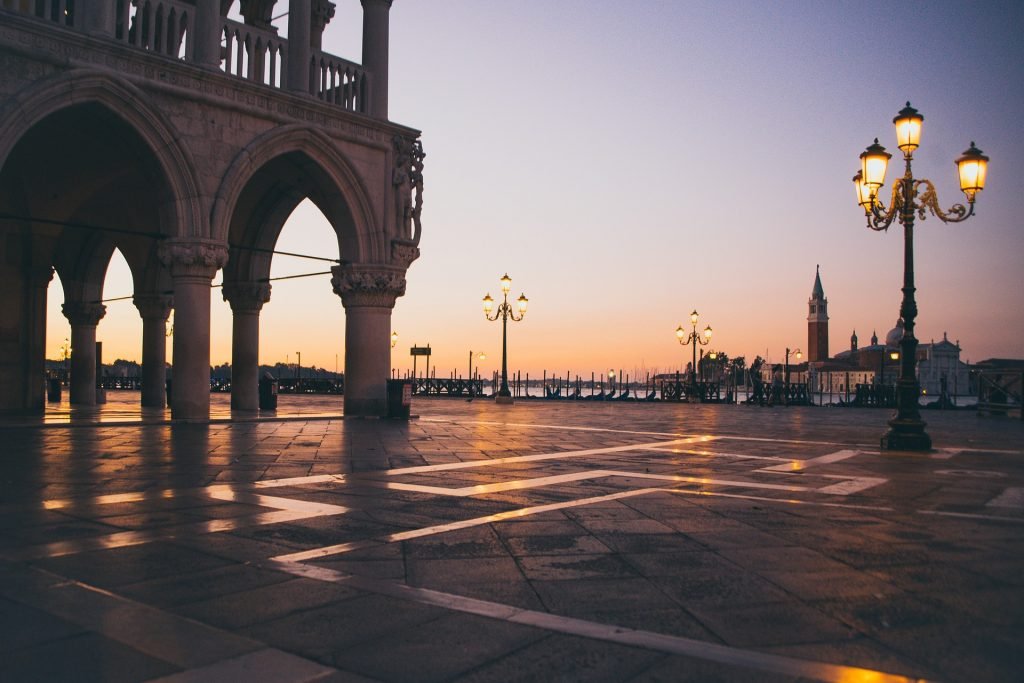
For the composition, I wanted to try doing some softer shadows/reflections for this Venice scene. Remember to make those background buildings lighter. It’ll push them back and create more depth in your painting.
Drawing and Painting Tips:
Wet-in-wet effects are tricky. In short, magical things happen on paper once you get a hang of how to use wet-in-wet techniques. It takes time to be able to pull off the same wet-in-wet effect to paint something, even a shadow. There are so many variables; how wet the paper is, how much paint is on the brush, the speed of your brushstroke. it all changes the final outcome. You’ll get there.
The only way to learn this technique is to keep practicing dropping in paint to an already wet area, and observing how it reacts, spreads, and dries. Do this on paper of differing levels of wetness. After some time, you’ll begin to understand how the paint and paper react on wet paper and can more predictably create intended effects.
Composition:
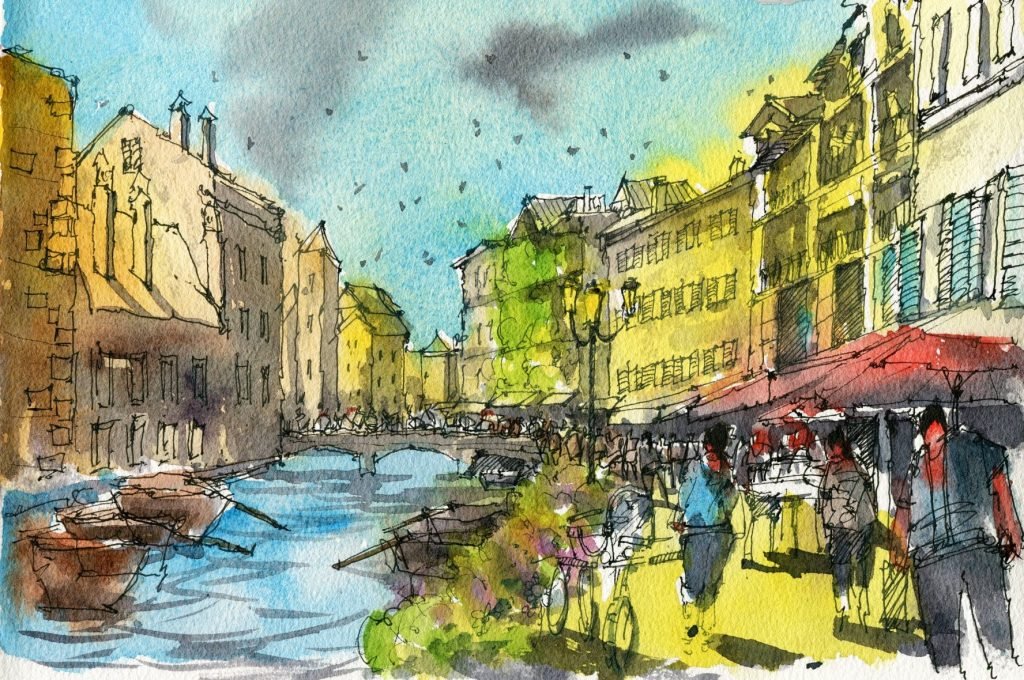
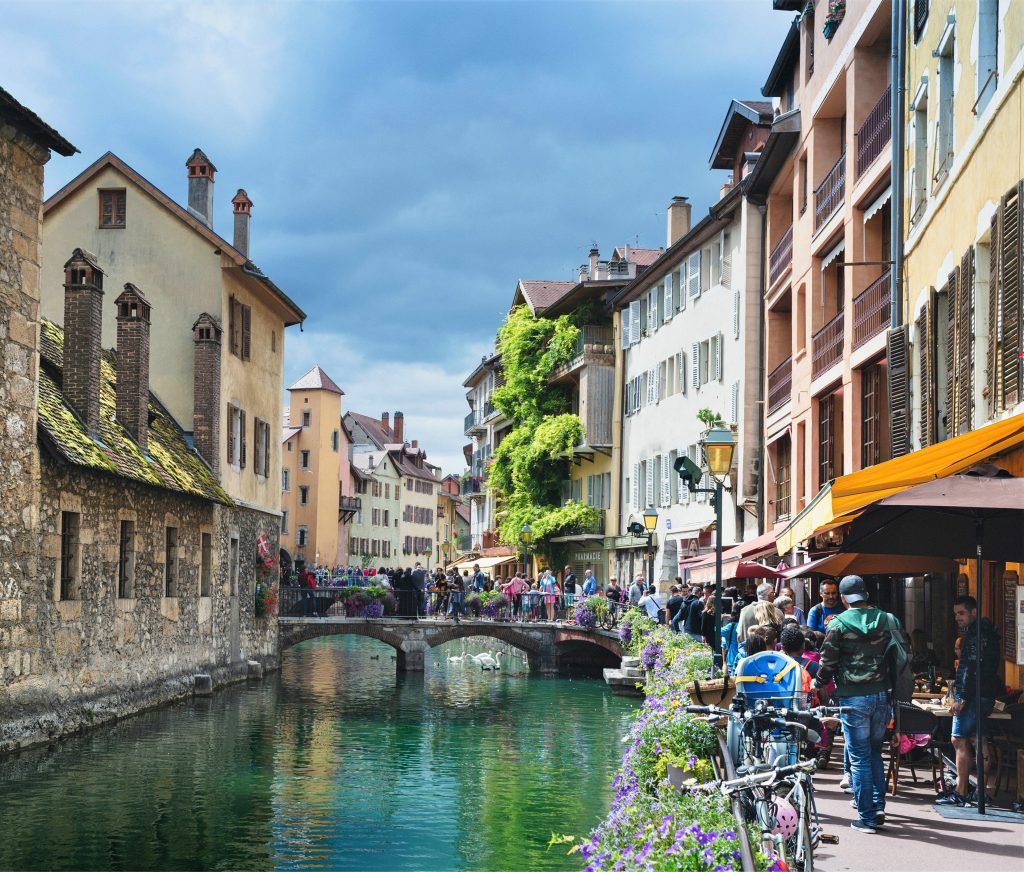
I found that in this Annecy scene, adding those dark shadows on the buildings to the left and to the right of the figures really brought out the light on the pavement and buildings. Looking at the left-hand side, I added some boats in the water as I felt that area was too empty, given all the detail on the right side of the illustration. I also altered the reference so that there was more of a footpath. In the photo, the footpath was narrower and constrained to the left. So what I did was expand it out past the middle of the page so I could add more figures and details to the right-hand side.
Drawing and Painting Tips:
When trying to draw a building or even a person, I try to see them as shapes. For a building, I might picture it as a box, or a person, a sphere on top of a rectangle. I also try to pay attention to the size of a shape. This is especially important when we consider their size in relation to other nearby shapes.
Always remember when placing heads of the figures, be wary of their height in relation to the horizon line. This creates different vantage points and can imply flat or uneven terrain. I keep the heads at the same level for flat terrain.
A final tip is to try to get the shadows of the figures running in the same direction! In this scene, I did that by painting one shadow first, and then using that as a guide so the others fall in the same direction.
