
Paint a Goldfish in Watercolour with January’s Featured Mentor Mirjam Thomsen
I would like to introduce Mirjam Thomsen as our featured mentor for January! Mirjam is an artist and mentor in our watercolor community.
For January, Mirjam has shared a full-length video + written tutorial!
The ‘Featured Mentor’ is an initiative in our group Watercolour Beginners & Supportive Mentors. On selected months, an experienced artist will share a full-length tutorial and challenge for you to complete.
To enter this challenge, watch the tutorial below and upload your creations to this post on Facebook: https://www.facebook.com/media/set?set=oa.1207479103193892&type=3&av=786863608123605&eav=AfaKuKbL8CqwDXxDtJ_ctfd4K_UWZFQxzxGtkP71-ssCMh3tKf0jLwDN0HomeWa5ydw
When sharing your entry, please include some details on how you created your painting and progress shots if you manage to take extra photos! Remember to title your post ‘January Challenge’. At the end of the challenge, Mirjam will select the winners!
Here’s Mirjam’s feature and challenge:

About The Artist:
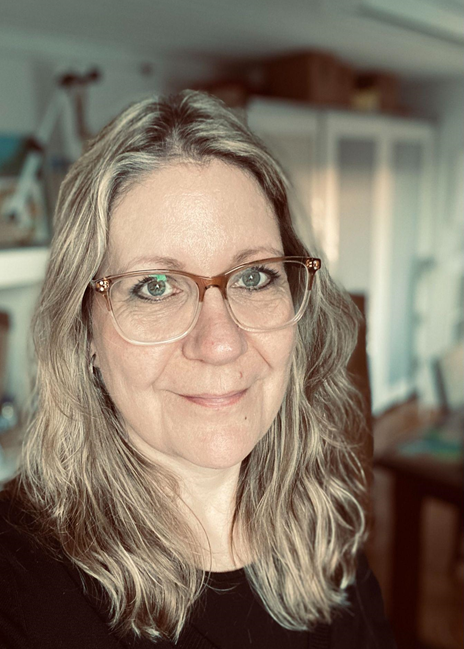
Hi everyone, my name is Mirjam (Miriam) and I’m living in Denmark with my husband of 25 years and my two children – a boy and a girl who is now 20 and 16 years old. How fast time went by!
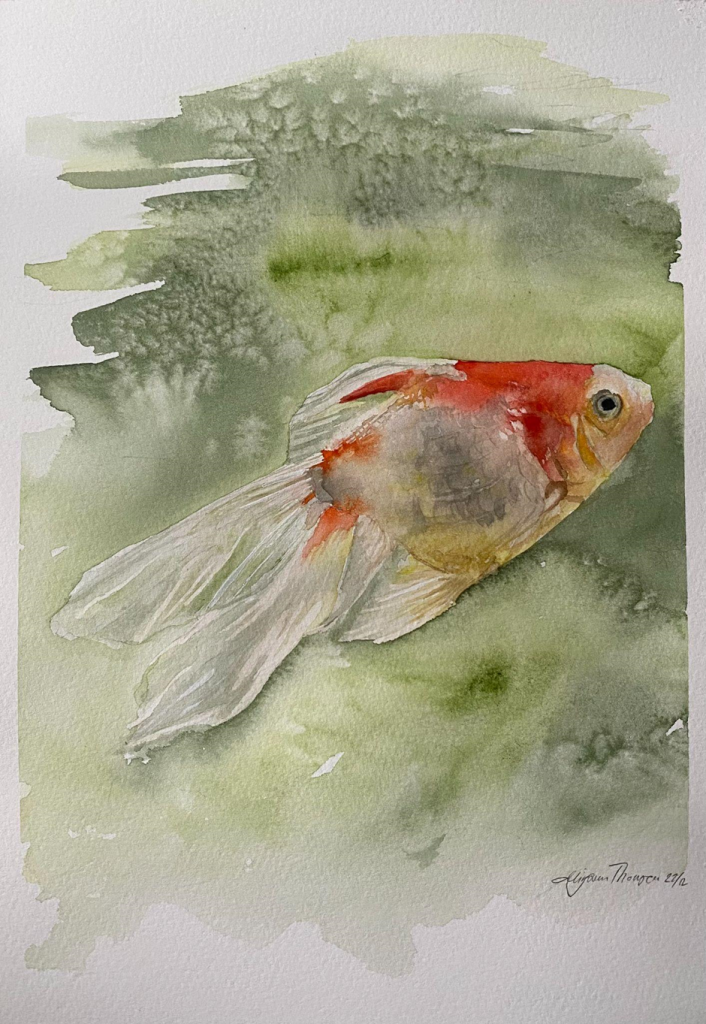
Today I would like to show you how I paint a goldfish – that was a real challenge to me, but I think it worked out well, so I hope you will give it a go!
Since I was very young I have loved to draw and paint. I really wanted to make it my living, but it was just not possible at that time. There were almost no education possibilities, only very expensive ones, so I had to figure out something else. However, during the years I have taken some courses and for the last 3 years, I have gone in full time! And I’m loving every minute of it!
I love all painting mediums: Watercolour, acrylic, ink, and gouache, but it has been the watercolors that I have spent the most time with.
I love colors! And I love to find color pallets and figure out what looks great together. I also like to challenge myself so I paint all kinds of different things in different styles.
I use Daniel Smith watercolors and also a brand called Qor because the colors are so beautiful and vibrant. I also have good experience with White Nights watercolors.
My watercolor paper is always 300 g – and I find that I like it when it is at least 50 % cotton paper.
If you would like to see more from me, I have many different kinds of tutorials on my YouTube Channel: Mirjam Thomsen Art Studio – YouTube
I have also just started up a Patreon channel so if you would like to view more in-depth videos, you can check it out here: www.patreon.com/Mirjamthomsenartstudio
Be blessed
Mirjam
Watch Mirjam’s tutorial:
Find me on Social Media:
Pinterest: https://www.pinterest.dk/Mirjam_thomsen_art_studio/
Instagram: https://www.instagram.com/mirjam_thomsen_art_studio/
YouTube: Mirjam Thomsen Art Studio – YouTube
Patreon: https://www.patreon.com/Mirjamthomsenartstudio
Materials Required:
Paper:
- 300 g watercolour paper
Brushes:
- ES 1002 No 12 Round
- Silver black velvet No 6 Round
- Silver black velvet No 300s
- Betty Hawkins No 4
- Flat brush No 6
- An old brush – preferably a natural hair brush
Paint:
- Pyrrol Scarlet
- Sap Green
- Naples yellow
- Gold
- Pyrrole Orange
- Lemon Yellow
- White Gouache
Other:
- Masking tape
- Masking fluid
Reference Photo:

Project Steps
Step 1:
The paper is taped to a board with ordinary masking tape and the board is flat on the table.
I begin the painting by putting on the masking fluid where I want to keep the highlights on the fish. Use an old brush for the job.
After the masking fluid is dry, I begin to paint the fish’s head.
I wet the area I’m going to paint first and then I begin to put in the paint (Naples yellow) and later a mix between sap green and Naples yellow. Next, I continue with the upper half of the fish where I put in a watery mix of Pyrrol Scarlet, wet on wet.
Then I continue to wet the paper on the middle of the fish’s body, drop in some of the pyrrol scarlet, and then mix the red with sap green for a darker red.
I work on the fish step by step and shift between working on the fins and the body – this is so that the layers can dry in between. My colors are very light here on the first layer of the fish.

Step 2:
Working on the body with the second layer of paint
Now I begin to put darker paint on the fish, I build the painting up working from light to dark. I find it best to do it like that and also to work wet in the wet most of the time. But I do control the areas where I put the paint in by wetting it in small areas at the time. Around the eye I work wet on dry and then I soften the edges with clean water. After the second layer is dry I go in with my No 6 brush and soften some edges by rubbing the paper gently with a damp brush and then dabbing with some paper towel. After that, I go to the lower part of the fish and put in some gold paint.

Step 3:
First I wet the paper in the area around the fish, I make sure to be careful not to wet the fish.
Then I begin to put in some Sap Green. I’m just putting in the color randomly. Then I put in a mix between the Sap Green and the Paynes Grey. I don’t fill out the whole background with color. When I’m satisfied with how everything looks I sprinkle in some salt – this will give the background a lovely texture. I allow everything to dry completely before I continue!

Step 4:
Now it’s time for the third round of the fish. I make some very light lines on the body of the fish to suggest the scales. I don’t paint the scales in, scale by scale, but just here and there so you get the idea of scales. I also put in a strong mix of the red color so that will be a bit more dramatic. I take my time with the last step of the body and enhance where I think it’s needed.
When I’m satisfied with the body of the fish I begin to work on the tale and the fins of the fish. But first I remove the masking fluid. I very gently rub the masking fluid off with my finger!
After that, the white areas looked a little bit too white, so I painted in some very light washes of color to soften the white a bit. In some places, I also went in with a damp brush and blended the edges so there would not be too many very sharp edges.
After that, I attempted to make some white lines on the tail of the fish with a flat brush, but it did not work out very well, so I painted some lines with white gouache.
And there you go! The painting is finished. I peel off the masking tape using a hairdryer to soften the glue on the masking tape so that it won’t tear the paper when I take it off.