
Paint an Australian Landscape Easily
Want to paint an Australian landscape easily? It’s been a month since the last free workshop, and I was really looking forward to demonstrating how to paint this beautiful scene. Let’s have a look at how I put together the painting below:
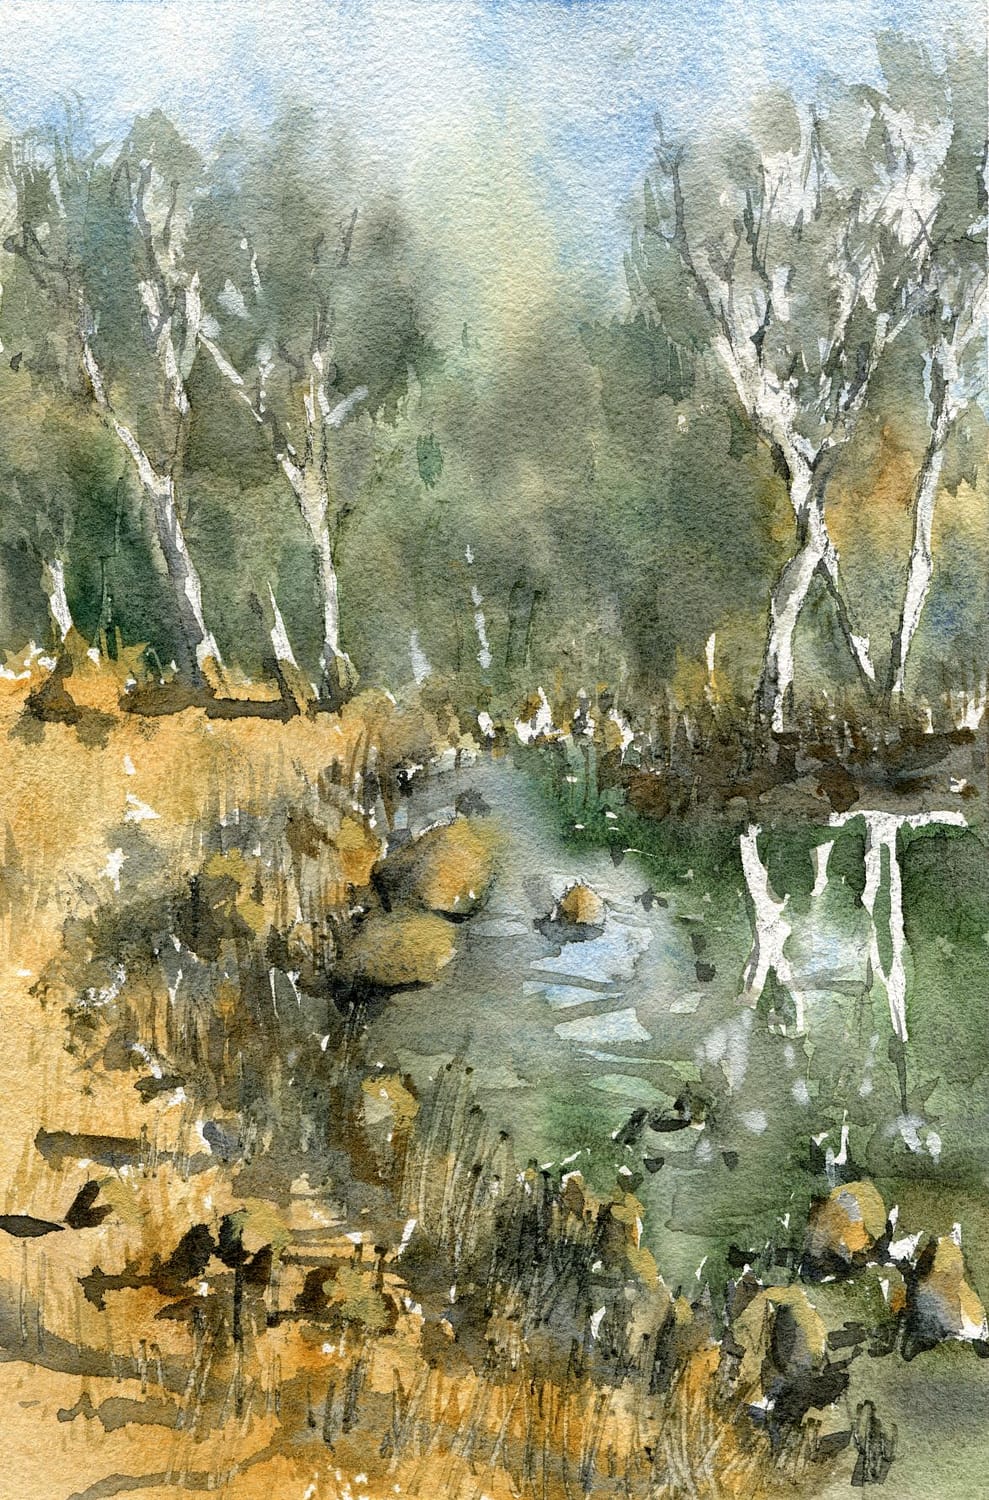
Paint an Australian Landscape Easily: Wet-in-wet technique
When painting natural landscapes, always remember to use wet-in-wet techniques to paint as much as possible. Why’s that?
Wet-in-wet technique allows you to utilise the natural strength of watercolours in order to create atmospheric, loose shapes. You can indicate background trees with a few dabs of green paint on wet paper.
You’ll also find that it is nearly impossible or frustrating to paint every little detail. Wet-in-wet allows you to suggest shapes and get the ‘gist’ or an ‘impression’ of what you see in the reference photo or scene in front of you.
Let’s take a look at the reference photo below:

So how do you use wet-in-wet technique, and what is it anyway?
It’s simpler than you think!
All you need to do is to add a light wash of colour to the area(s) of paper first. This can be clean water or a light wash or yellow or green, or whatever colour you’d like to use to represent light.
You want to make sure that you’ve added a copious amount of water into your paint mix – roughly 10% paint and 90% water. The wash should look very transparent and almost ‘weak’ when you apply it to your paper.
Once you’ve done the above, all you then need to do is add more paint to the wet area!
Sounds easy, right…?
Unfortunately, there are a few more considerations.
When we are using wet-in-wet technique, we are simply creating soft shapes, and allowing the paint to mix on the paper rather than on our palette. Sometimes both.
So, you need to keep in mind how much water is on your paper vs. how much water is on your brush.
A good rule of thumb is to make sure the paint on your brush is thicker or more concentrated than that on the paper.
If you introduce too much water into an area of your painting that is starting to dry… guess what? You’ll end up with some blooms! So unless that’s the effect you’re aiming for, you’ll want to keep this rule in mind.
As an exercise, you can take out a piece of paper, draw a few rectangles, and add water to each rectangle. Try experimenting by letting each square dry a little more than the one before it. Then, add some paint and see what happens.
You’ll find that if you let an area become damp or drier, any additional paint you add afterwards will spread less. This gives you more control and allows you to create more defined (but still soft) details.
Once everything has dried, just add in some sharper and darker brush strokes to indicate shadow.
Want to truly learn how to use wet-in-wet and wet-on-dry techniques? I have a free workshop that’s available below. Make sure you check it out, as I go through my entire process step-by-step to help you master the essentials of watercolour.

