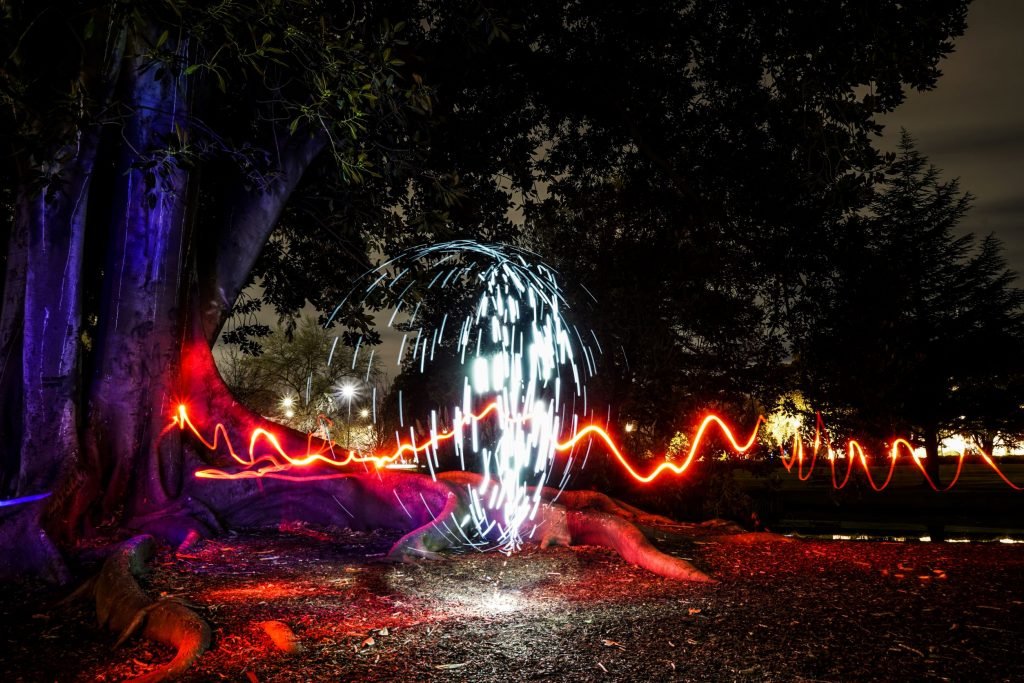
Light painting is new to me. But I created some anyway… what do you think? 🙂


Hi everyone, this post is a bit different from my normal watercolour ones. Lately, I’ve been trying different things to spark my creativity – there are so many tools and methods that can be used to create art.
So I decided to experiment with another type of painting… light painting! Since I was a kid, I’ve had an interest in electronics and flashlights. I remember my mum taking me to Dick Smith Electronics over in Perth to buy capacitors and resistors for different projects I was working on. I’ve been thinking of ways to integrate that side of things with my art.
Anyway, I reached out to Ledlenser to see if they wanted to collaborate. Over September, I ended up creating a series of short light painting videos and photographs! Ledlenser kindly provided me with two of their flashlights, the P6R Core QC and P7R Work UV. I used both for these shots (and upcoming videos). I own the P17 and used to own the P7 until it was stolen from my car, so thought it’d be fun to try out some of their newer lights.
So, what is light painting? It’s a photography technique where you use different light sources and tools to colour, draw and paint a subject. This can be a portrait, landscape or everyday object.
I was drawn to light painting because of one similarity it shares with watercolour painting. The element of surprise! You never know exactly how it’ll turn out (good or bad). I found it strangely exciting waiting for the camera to process each exposure.
To create a light painting, you’ll need a camera, a light source (I use a flashlight) and a dark area.
Camera settings:
- ISO 50-200
- F10-18
- Exposure 30 seconds+
Basically, you want a long exposure time paired with a low aperture and ISO. This is to ensure the camera captures the movements and areas that are lit up. Having the ISO on lower reduces grain and also makes sure the photo isn’t over-exposed due to the duration of the shot.
You can also create a light painting with a shorter exposure time like 2-3 seconds. This is for capturing simple light trails or a single shape.
You can create light paintings with your phone camera too but in most cases, you’ll have to find a manual camera setting or app (e.g. open camera for Android).
I use a mirrorless camera (Sony A7C) on a tripod. Also didn’t use any fancy light painting tools, just a torch and a piece of string tied to it!
I’m planning to do some refractography images soon but in the meanwhile, I hope you enjoy browsing through these shots – let me know what you think. Will post the videos soon.

